Before Windows 10 and 7 when Windows XP was popular operating system taking a screenshot on Windows was not easier without any third-party screenshot tools.
We will start with Windows 10 to Windows XP, and then we will discuss a few third-party screenshot tools.
How to take screenshot on Windows 10
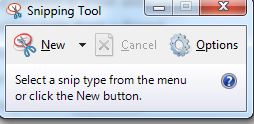
Windows 10 has a feature to save a complete visible area screenshot with the help of Print Screen and Window key. Just press these key combination to take a full-screen snap and it will be saved to My Pictures area. All version of Windows from Windows Vista includes a built-in screenshot tool called "Snipping tool" that let you create a customised screenshot of your opened programs and provides some useful features like underlining, highlighting and much more. The snipping tool can be found by search its name on the start menu or you can navigate to Start Menu > All Programs > Accessories > Snipping Tool.How to take screenshot on Windows 7
Since Windows Vista, snipping tools have been included in Windows. So you can access snipping tool on Windows Vista and Windows 7 on above mentioned paths.How to take screenshot in Window XP
In Windows XP there is two option to save screenshot through Windows paint or any other image clipboard program. To capture entire page use Window key and Print screen button and for current Window use Alter and Print screen buttons, it will copy a snap to the clipboard, and you can paste the image in Windows Paint and save it.If you need to take screenshots on a regular basis, I will recommend you using third party screenshot tools for Windows.


0 comments:
Post a Comment